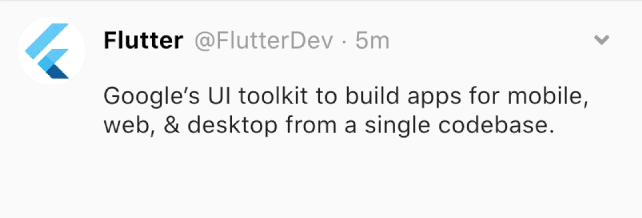
Twitter UI clone using Flutter — Part 2

Hi everybody,
This is a post continuation from the first part. You can read it here.
In this post, we are going to code a list of tweets. Let me introduce you to Flutter Layouts.
Layouts are widgets and they are used to build UI. You can compose simple layouts to build complex layouts.
There are two types of Layouts:
In my post, we are going to use both of them.
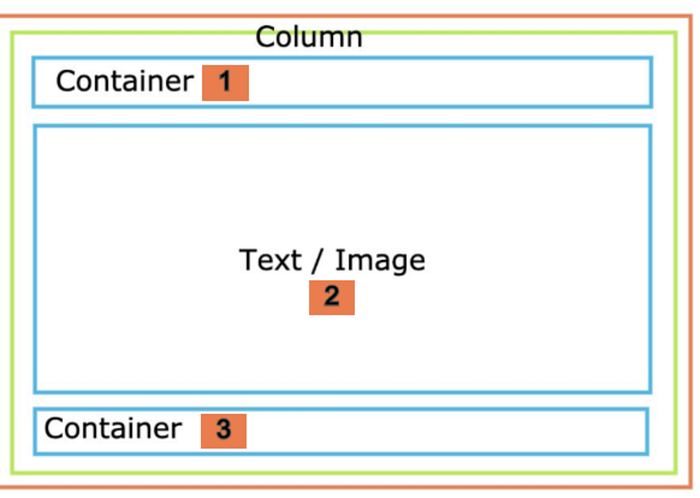
At first, we could diagram which layout we are going to use, for example:

It’s could be the first approximation for our design. Note, some Container will have Row or Column as child.
Now, let’s code!
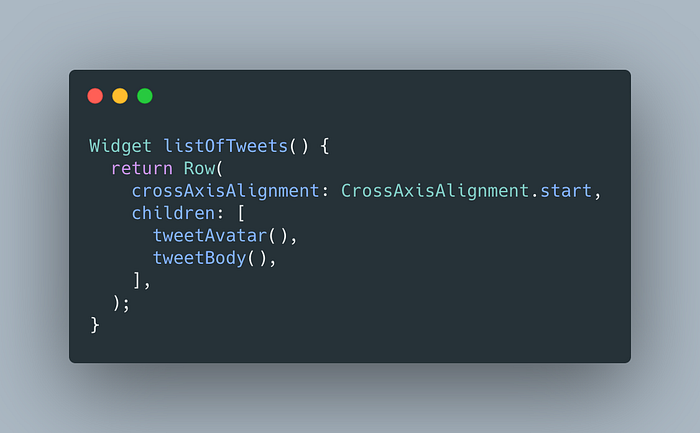
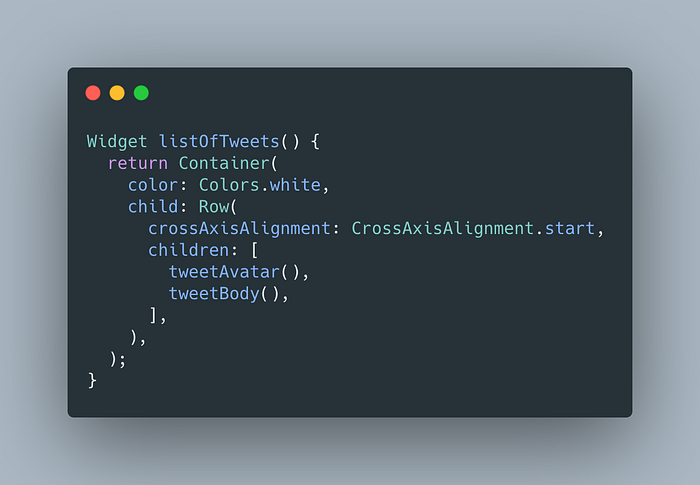
Scaffold the widget has a property called body . This property allows us to build our list of tweets. We need to create a new function called listOfTweets .

listOfTweets is a Row and has only one child, for now ;).

Output UI is just CircleAvatar with margin set on10.0:

crossAxisAlignment will be directed in the secondary axis. In Row case, it will be a vertical axis. So, CrossAxisAlignment.start will be top and left alignment.
The next step will be to build the name, username, and duration time. For that, we are going to create a Column in order to align the widget below another.
I refactored the avatar in a function called tweetAvatar and I created a new function called tweetBody to set on a name, username, duration time, and options icon.
tweetBody the function looks like that:
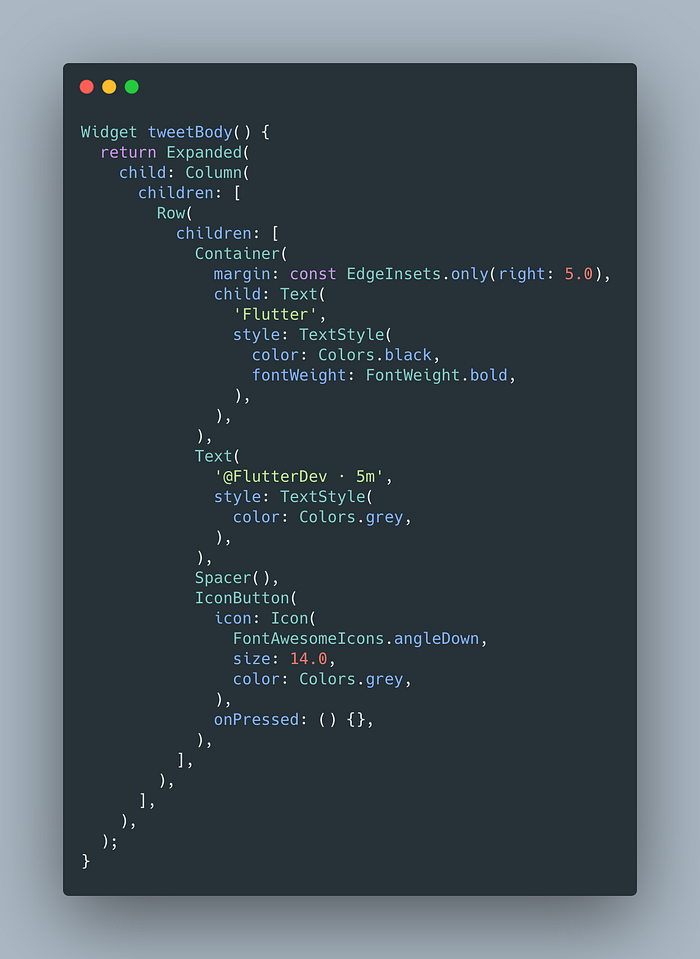
Wait wait, let me explain to you!.
I’m going to explain from inside to outside. We have 4 widgets here:
Container which set the name.Text which set a username.Spacer which is used to fill empty spaces between Widgets.IconButton which is an option button. I used icons from FontAwesomeIcons package.
These 4 widgets are wrapped by Row because they have to be one side-by-side widget.
This Row is wrapped Column because is the first child of three. And this Column is wrapped by Expanded because we need to use a width-size screen. I mean, children fill the available space in the horizontal direction.
I refactored tweetBody function to make easier visibility and maintenance.
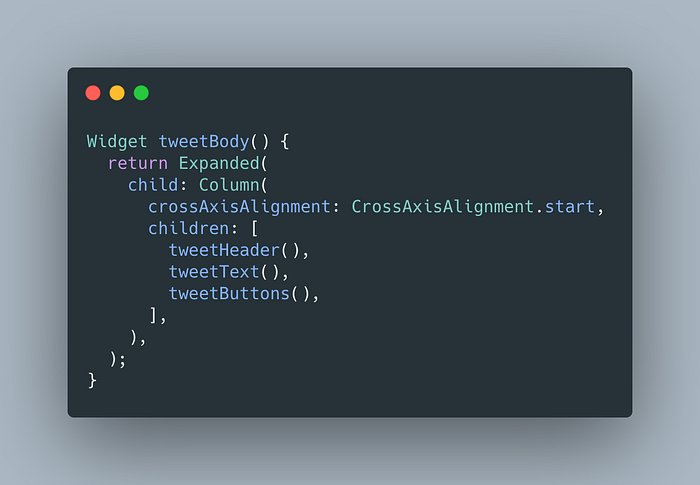
I added crossAxisAlignment.start to align text to left.
tweetText the function is a simple Text widget with overflow property set on clip . overflow the property indicates how the text will be shown. Clip the overflowing text to fix its container.
It looks like this:
We can set the color background to white in listOfTweets function.
Good, we are going to right way!
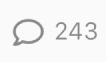
The last widgets are buttons for comments, retweet, like, and share.
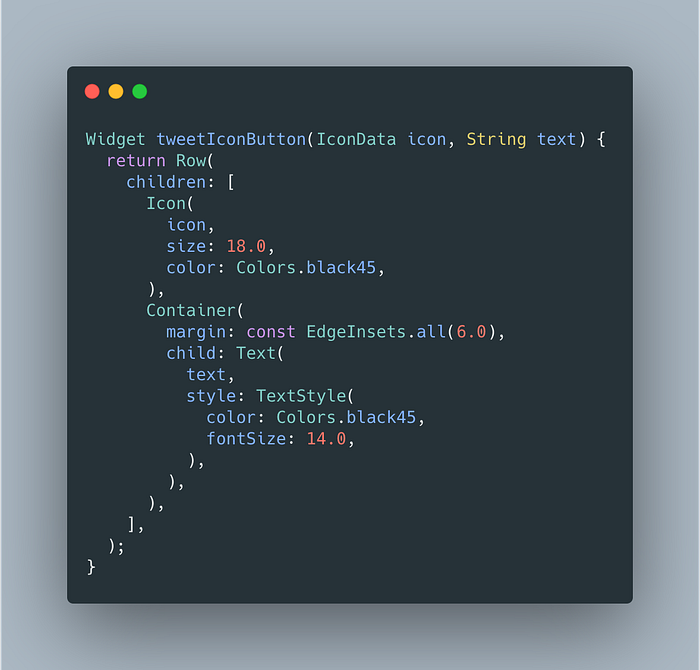
We could build a widget to show an icon and a number.
And we can copy 4 times.

We could use a Row because we need to one widget side by side. Its children could be an Icon and a Text . Something like this:
We just need to use 4 times with correct params.
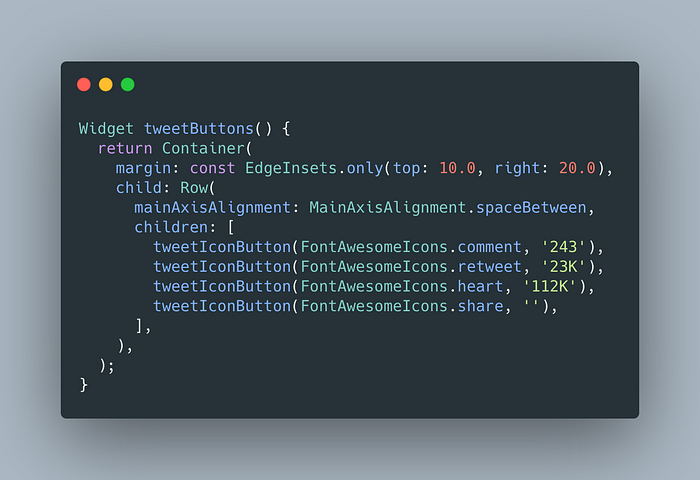
We need to use another Row because tweetIconButton have to be one widget side by side.

We used MainAxisAlignment.spaceBetween because we need to place the free space evenly between the children.
Until now, it looks like this:

Well, in the next post we are going to add ListView to show list of tweets and add FloatingActionButton .
The full code is available on GitHub.
If you want, you can read my previous Flutter articles!
More content at https://mtc-flutter.com
That's all folks!
Enjoy!